Roll
Enjoyed by two-fifths of adult smokers, hand-rolled cigarettes are particularly popular in the United Kingdom. The fine tradition of hand-rolling cigarettes goes back to 1614 when orders by King Philip III of Spain led to Seville becoming the world centre of cigar production. Beggars would pick up the remnants of used cigars and re-roll the remaining tobacco in newspaper. The practice of rolling tobacco in paper spread through the working class, and the rest, as they say, is history.
If you want to start rolling your own cigarettes, you’ve come to the right place.
How To Select The Right Tobacco Blend
The most important qualities to consider when choosing hand rolling tobacco are texture, moisture level, and cut.
Texture: Too coarse tobacco is difficult to roll, while very fine tobacco is fast-burning. Medium-textured tobacco is ideal.
Cut: Choose tobacco with a uniform cut for easy rolling and a consistent burn.
Moisture: Select tobacco with balanced moisture that offers easy rolling, an even burn, and smooth smoke. Too dry, and it will burn quickly and produce harsh smoke. Too wet, and you might struggle to light it and it may cause runs.
It’s also important to choose hand rolling tobacco with a nicotine content and flavour profile that matches your personal preferences.
How To Roll Cigarettes By Hand
Mastering the art of rolling your own cigarettes requires patience and practice.
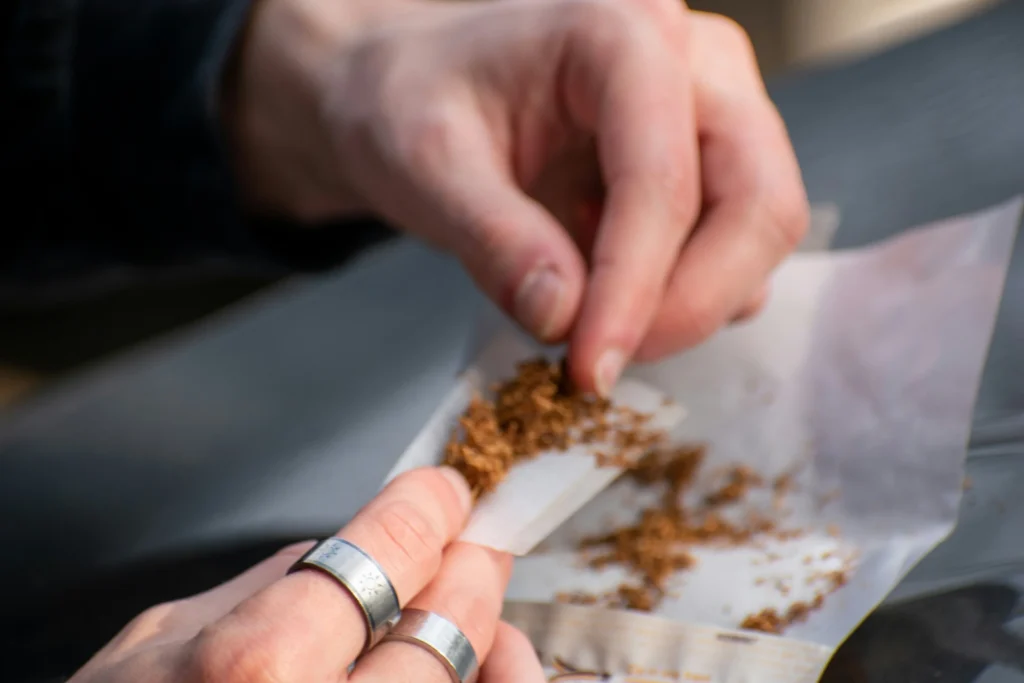
Step 1: Gather your rolling papers, filter tips, and rolling tobacco.
Step 2: Take a roll of paper and place it on the side furthest away, with the gum strip facing up. Fold the paper in half to form a crease.
Step 3: Take an amount of tobacco to suit the filter size and how fast you want your cigarette to burn. Pull the tobacco apart to loosen it before spreading it along the crease in the paper.
Step 4: Carefully pick up the paper and hold it lengthways with the crease between your thumb and forefinger. Spread the tobacco along the crease to ensure there are no clumps and the consistency is even.
Step 5: Use both thumbs to roll the bottom end of the paper back and forth over the tobacco while using your forefingers to support the tobacco from behind to give the tobacco a cigarette shape. It should feel firm yet springy right across.
Step 6: Open the paper and add a filter tip at one end of the tobacco. The filter’s diameter should be 0.5-1.0mm smaller than the shaped tobacco.
Step 7: Tuck the bottom end of the paper behind the tobacco while keeping the paper rolled neatly around it.
Step 8: Roll your thumb over the tobacco in the paper to roll the cigarette upwards over your forefinger and middle finger while ensuring you maintain the same pressure over the whole cigarette to close it.
Step 9: Moisten the gum by licking it when you get to the top of the paper, then keep rolling until the gum has stuck to the paper.
Tips And Tricks
Best for beginners: If you find hand rolling tricky, use a dual roller-style rolling machine. Simply pull the rollers apart, place your tobacco and filter tip into the groove, close the rollers, give them a couple of rolls, slip a rolling paper (gum at the top, facing you) in where the rollers meet, roll a couple more times, and open the machine to find a freshly rolled cigarette.
Keep your hand rolling tobacco fresher for longer: Use one of the following methods to keep your tobacco fresher for longer:
Store your tobacco in a specially designed tobacco box.
Place your tobacco package and a humidifying stone in a clean cardboard box such as a shoebox.
Place your tobacco package in a resealable plastic bag or can and keep it at the back of your fridge.
Store your tobacco package in an airtight plastic container in a cool, dry place that doesn’t receive much direct light. Last but not least, always use high-quality tobacco. The Backy Shop has everything you need for an exceptional hand-rolled experience.